Showing posts with label Disney. Show all posts

Thursday, June 12, 2014

Disney Cruise - Pirate Night Tips

One of our favorite nights on our Disney cruise sailings has been pirate night. These occur on select cruises, mainly in Caribbean and Bahamian sailings. The evening has a host of pirate activities, including themed pictures with characters, pirate trivia, a pirate themed dinner menu, and a deck party including fireworks! Up until recently, Disney cruise line was the only company to be able to offer fireworks at sea. Now you can also see them on on Norwegian Cruise Line, but for our money.....we are still sticking to Disney. :)

Are you going on a Disney Cruise and want to make the best of it? Here are some of the tips we have picked up over our sailings.

1.Dress up! Many people are concerned about how much to dress up for pirate night. On every cruise, we hear someone comment with regret that they wished they had brought pirate costumes. However, no one who has dressed up has ever seemed to regret it. At home, it may be seem like a hassle to pack pirate costumes, but once you are on the ship and seeing other people dressed up, you will be glad that you did. For our family, pirate costumes take up an entire large suitcase, but I still would not leave them home! There are always people who chose to just wear a pirate T-shirt (I was one of those on a cruise when I was pregnant with Squirt), but fully enjoying the theme of the night and wearing your pirate best is really fun. Pirate costumes are available for purchase on the ship if you would rather buy them there, but don't plan on them being cheap.  Disney does provide each passenger with a pirate bandana, so if nothing else, you can sport that.


2. Put your costumes on before First Seating/First Show. Don't wait until it's dark to get into the pirate spirit! We aim for around 4 o'clock to gather everyone back to the stateroom to get ready. We usually have second seating for dinner, and we like to get our costumes on before the show that night. That way, if you want to get some pictures taken between the show and dinner (or vice versa if you have first seating), you are all ready.

3. On the larger ships, the Dream and the Fantasy, there are two pirate deck parties. On the classic ships, both shows are combined into one which is shown after second seating. The first is aimed towards younger children and includes Mickey and friends. The second one, after second dinner seating, is more for older kids and adults and includes Jack Sparrow and fireworks. You are welcome to go to both if you like. The times will be listed on your Personal Navigator. Our family really likes the second show.


4. Wear comfortable dancing pirate shoes. After the second show, the upper deck turns into "Club Pirate" complete with a DJ. Fun family dance party under the stars!

5. If possible, take a nap. Pirate night tends to be a night we are all up very late. Of any day on the cruise, this would be the one to plan for a nap for little cruisers if possible.

6. Save a little room. A pirate buffet is served in Cabanas after all the deck party fun has happened, complete with yummy deserts and turkey legs! Especially if you have late seating, keep this in mind while you are eating dinner.

7. Be aware that there is a possibility that the fireworks and deck parties may not happen. Sometimes bad weather happens, and it is just not possible. However, Disney will do their best. On our most recent voyage, I realized we were turning shortly before the party began, and found out afterward that the captain steered off of our original course to go around a rain storm so that there could still be fireworks and fun up on deck.


Monday, May 19, 2014

Shutters Photography on the Disney Fantasy

Our family just arrived home from our wonderful voyage on the Disney Fantasy. This was our fourth Disney cruise, and the second time aboard the Fantasy. Our family now feels a little like the Fantasy is our "home" ship, and we love it! Unlike the rest of my crew that takes to the seas a little better than me, I am continuing to walk a little like Captain Jack Sparrow while my sea legs wear off. It was definitely worth it though.

On-board the ships, there are photographers taking pictures at different times and locations throughout the ship. While we have purchased some of the photos on our past trips, we decided to go with the entire package of digital images this time. At the time of our sailing, to purchase a CD with all of your photos, the cost is $349 on the ship, or $295 if you purchase beforehand. There are other packages available. The smallest package is 10 images on a disc for $149. If you visit www.mycruisephotos.com you can see what is available and place a pre-order if you wish.

We made more of an effort to get our pictures taken this trip. Formal night fell on Mother's Day, and one thing I really wanted was family pictures. We do have some, and while they turned out nicely, they were missing a certain....something. Brady, for one, does not understand why we are getting our picture taken by the train tracks or an old side of a barn. Esthetically, these backgrounds look wonderful, but I do get his point. I was willing to spend the money on the photo CD because I know that the family pictures I would get on the ship mean something to my family. These are pictures of us having a wonderful, memory-filled time, and not just Mom making them dress nicely and smile.

These are some of the pictures we had taken on formal night when we were all dressed up.


Where else but a Disney cruise can you get formal pictures with Minnie dressed up as well? An opportunity we could not pass up.


My Tips: 

Especially if you pre-order all of your digital images, make time to get those pictures taken. After all, you have already paid for them. It is easy to get caught up in doing everything on the ship, but you will truly love the photos when you are back home. 

Take advantage of short lines when you see them. On a few occasions we saw a photographer set up and just waiting for guests to photograph. Even if the background is not exactly what you want, it will only take a few minutes, and it doesn't cost anything to get the picture taken. You never know, you may really like the results.

Don't worry about everything being perfect. Chances are, it is not going to be, so there is no sense in worrying about it. al

Go to Shutters periodically throughout the cruise to check on your photos and make sure they are all there. Our first Aquaduck pictures did not make there way to our account automatically, so we had to do a little searching to find them. Sometimes the facial recognition system needs a little help.

If you have more than one stateroom for your family, go to Shutters on the first day to ask for those rooms to be combined on the CD. This only applies to immediate family members (i.e. parents and kids), so if you have a giant family reunion on board, you cannot combine all those rooms.

Especially on formal night, get there early if there is a background you want. The people at Shutters can give you more information about times and backgrounds. The line for having your pictures done on the staircase gets very long. We arrived a few minutes before the photographer (by accident) and we were about to get a few different locations, and pictures with Minnie in the time that those who arrived later had to wait in the single line.
  _________________________

We had many more portraits taken throughout the cruise, actually 97 in all. I would like to share some other topics and tips about cruising over the next month or two, so I will be sure to share more of them.


Friday, January 17, 2014

Double Layer Skirt Tutorial


We are all very excited for an upcoming Disney cruise. Waiting can be very tough, so I really like doing projects for our trip to help the time pass by. It also makes the cruise even more fun.

Gizmo had a Minnie Mouse shirt that I had previously purchased for her. She has outgrown it, and so it was passed on to Princess. While I think it is a too long, she loves it, and refuses to let me take a couple inches off the bottom. With the picture on it, I am not sure how well that would work anyway. To go with her shirt, I decided to make a cute matching skirt.

To make the skirt, first get some measurements from the child it is for. The first measurement will be around their waist, and the second measurement is how long you want the finished skirt to be.

To the waist measurement, double the amount. This is the width of both of the fabric rectangles you will be cutting out.

To the length measurement, add 1.5 inches. This is the length of the underlying fabric, which I will call Fabric B.

Next, take Fabric B's length measurement and subtract 2. Now you have the length measurement for Fabric A.

                  Example:
                  Measurements:
                  23 inch waist measurement
                  12.5 inch length desired

                  23 x 2 = 46

                  12.5 + 1.5 = 14

                   14 - 2 = 12

                   Rectangle of Fabric A will measure 12 by 46 inches.
                   Rectangle of Fabric B will measure 14 by 46 inches.

All seam allowances are 1/2 inch.

Cut out your fabric pieces with the measurements you just made.

Fold the pieces in half, matching the short ends, with wrong sides facing out. Sew along that edge. I chose to trim that edge afterward with pinking shears.
 Choose which open end will be the bottom of the skirt. This only matters if your fabric has a directional print. Fold up the bottom edge 1/2 inch, pressing as you fold. Repeat and fold up another 1/2 inch, pressing once again. Repeat this on both fabric pieces. This will give you a nice finished edge along the bottom of the skirt. Sew around both hems.
Arrange the skirt pieces with the underskirt inside, and the wrong sides of the fabric facing out. Pin along the top edge, and then sew the skirts together.

Turn the skirts to the correct sides out and press.

Measure along the top of the skirt and mark 1 1/4 inches down. Chalk is helpful for making the marks, and will wash off easily.
Sew along that marked line, stopping a few inches before you reach the point where you started. This creates an elastic casing.

Cut elastic to child's waist measurement, and thread into the casing. This is easiest using a safety pin attached to one end, pushing it along through the casing. Just make sure to watch the end of the elastic and don't let it slip into the casing. You will need both ends hanging out of that gap you left unsewn. Make sure that your elastic has not twisted anywhere. It is much easier to check now, then to find out later....

Holding both ends of the elastic, pull them out enough to hold them together under the sewing machine foot. Zig-zag stitch several times back and forth to attach them.
 Holding the skirt up, give the waist band a few stretches. The elastic ends should pop up into the casing. Sew up the gap in the casing. 

Enjoy giving a sweet kiddo in your life a new skirt made just for them. 


Tuesday, May 8, 2012

Home from the Disney Fantasy!

We are home once again after having a wonderful week aboard the new Disney Fantasy cruise ship. It was an absolutely splendid week and I was no where near ready to leave. We have sailed twice before with Disney, aboard the Magic and the Wonder. While both of those voyages were great, I do believe this was my favorite. I love the art nouveau and art deco design of the classic ships, and the Fantasy didn't disappoint. It was absolutely gorgeous! I will write some posts about some of the things we did during our week in paradise....but for today I thought I would show you at least some of my favorite details of the ship.


The lobby of the ship is the first place you see upon boarding. It is breath taking and my pictures don't do it justice.

The peacock-inspired chandelier.The chandelier.
A view of the lobby. Can you spot Aurora?
Looking down onto the lobby carpet.
I love the low-key bit of Disney fun!
Yours truly by the Mademoiselle Minnie statue.
The Walt Disney Theater, where all the big productions are held, is a masterpiece. Unfortunately, I did not get any pictures of it. I did take some pictures of the area right outside though.

The big kids and Walt.
While it is a little odd, I admit, I am enamored by the elevators on the ship...

The elevator area nearest our stateroom.
Elevator doors...note the Mickey hand pointing to the floor it's on.
The floor inside the elevator. It is actual stone that is inlaid!L


Because our little girl has to frequent the bathroom often, I saw many of them around the ship. I absolutely hate public restrooms, but every one I entered while on the ship was wonderfully clean and beautiful. They also have actual doors and walls, not stalls. Just one more way that I wish the real world were like a Disney cruise. I normally did not have a camera on me while in the restroom, and that might freak people out anyway, so I don't have many pictures. At one point I was the only one in one of the restrooms in the adult area of the ship and so I just had to take a picture of this mosaic.There were many wonderful mosaics around the ship...I just found it incredible that this one was in a bathroom!

If course, being on such a beautiful ship is so much better when you are sharing it with those you love.

My handsome hubby.


Monday, March 26, 2012

Packing for our Cruise

Our Disney Cruise is quickly approaching, and although I am not packing the suitcases yet, I have been making sure we have what we need. With a family of six, packing for a week long vacation is no small feat. When you add in special outfits for formal evenings and pirate parties, it is enough to make steam start erupting from my ears. That is why I made up this nifty little chart to help me out. Each member of our family gets a sheet of their own, and we just fill in the necessary outfits.


Packing Chart
I am offering it up here so that maybe some other frazzled cruise-planning mommies (or daddies), can have a bit if an easier time packing. If you can drop me a line if you decide to use it, it would make my day.

Tuesday, June 14, 2011

Minnie Mouse Hairbows

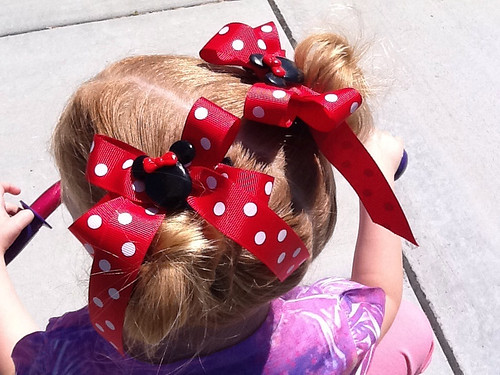
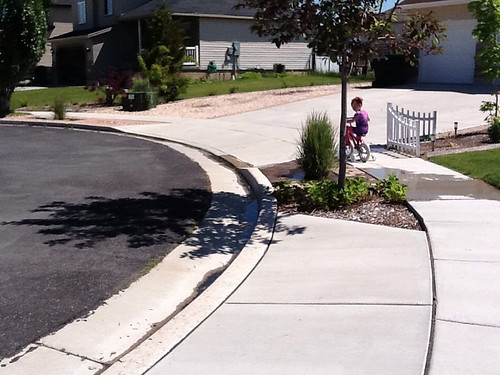
While I have quite a few projects in the works, this is my first finished project for the cruise. Just because I planned them for the cruise though, doesn't mean that Princess is not enjoying them a little now. I had to chase her down while she was riding her bike to get some pictures.
I made the little Minnie Mouse heads last week while me and the kids were playing with polymer clay. After I baked them to get them hardened up, and let them cool, I sprayed them with varnish to make them a little shiny. Over the next few days was were this project hit a bit of a snag. Princess really liked the little Minnie heads, and carried them around with her quite a bit. Some of the ears needed to be glued back on, and I had to tell Princess to stop washing them after I found them in the bathroom covered in soap. By some streak of luck, they managed to hold up well enough for me to get them attached onto hair bows.
I used the tutorial at this website to make the bows. The website has a bunch of tutorials for different hair things, so you should check it out if you are interested in that sort of thing. After getting the hair bow all finished, I just hot-glued the Minnie heads to the bow. Now all she needs is a Minnie Mouse dress to match. :)

Thursday, April 21, 2011

One Year Left

Today I am celebrating the fact that in exactly one year I am going to be on the Disney Fantasy cruise ship! It may still be a year away, but my preparations and planning have already begun. Pirate costumes need to be made, packing lists need to be organized, fun door magnets need to be designed, and custom T-shirts need to be printed. Hurray!