Showing posts with label Recipes. Show all posts

Friday, January 31, 2014

Chicken Noodle Soup - Part Two

This is the second part of my posts on making gluten and dairy free chicken noodle soup. On this post, I will focus on making the noodles, and finishing the soup. Part one discusses making the broth and preparing the chicken, and that can be found here. All measurements used here are for making a very large pot of soup, but it will last in the fridge for a few days and is great to reheat for lunches.

First things first, I pull the chicken broth that I made the previous afternoon out of the fridge and gently pour it into a large pot; most likely the same pot I made the broth in. As mentioned in the previous post, I have really close to a gallon of broth. I often pour it through a strainer. Also, pouring slowly helps keep some of the fat that has solidified in the container, and not in the finished product. I don't mind some of it making it's way into the soup, as it does add to the flavor and how satisfying the soup is.

Next, add:
3 cups of chopped carrots
5 garlic cloves (minced)
Salt and pepper to taste

While the broth simmers away, move onto making the noodles.

Noodles:
2 cups white rice flour (brown rice flour is not a good substitute for this)
2 cups tapioca flour
2 1/2 tsp. xanthan gum
1 tsp. salt
2 tsp. herbes de provence
6 eggs
1/3 - 2/3 cup of water

Preparation:
Mix together all the dry ingredients. This can be done on a bowl, or just in a pile on your countertop. I use the counter, since that means one less bowl to wash, and gives my children the impression that I am awesome. They sometimes gather to watch....


Form a well in the middle of your dry ingredients that can can crack the eggs into, and then....you guessed it....crack the eggs into it. It will look something like this.


Use a fork to break up the eggs and start incorporating them into the flour mixture. After a minute, you will need to use your hands to knead and squish the mixture to get it as combined as you can. It will not be holding very well together at this point, but you should be able to see it start forming. A little at a time, add water and mix it in well. In our super dry climate, I need to add almost 2/3 cup, but you might need quite a bit less. It is best to stick to a tablespoon at a time, mixing and kneading, until you get a a dough that holds together well. Your hands will be covered in dough by this point, so chase a kid of hubby around for a minute.

Dust your surface with the rice flour and start rolling the dough. Thickness can be a matter of preference, but remember that the noodles will get a little thicker when they are dropped into the broth. Roughly 2/8 inch is a good thickness. Ours tend to be thick, where my husband's grandmother made hers amazingly thin. This may be because I lack patience.

I am not reached perfection at rolling, and neither is my 11-year-old who was helping me. We always end up with a weird shape and not a nice circle or rectangle. If that is what you end up with too, that is alright! We are going for a comfort food item that would more likely be served in a grandmother's kitchen that in a fancy restaurant.

Using a pizza cutter, cut long strips that are 1/2 inch thick, or at least close to it. As I am usually just trying to get dinner on the table, mine are all sorts of thicknesses. The kids and hubby don't seem to mind. Make cuts cross-wise so that the noodles are about 5 inches long.
Using a spatula, pick up the noodles, separating any that stick together as you place them on a plate. Carry them over to the broth with about a plateful at a time. Grab a small handful and drop them in almost like you are sprinkling them into the broth. If they go in too quickly together, they will stick together into a big noodle blob.

Chop up chicken that was prepared previously, if needed, and then drop into the soup.

Bring to a low boil and cook for another 15 minutes, stirring frequently, and checking the noodles to make sure they are done.

Serve yourself and your loved ones up a comforting bowl of soup and relax.


Tuesday, January 28, 2014

Gluten Free Chicken Noodle Soup - Part One

My husband's grandmother recently passed away, leaving a big hole in the hearts of everyone who knew her. One thing that she was particularly known for was her chicken noodle soup. When I was first introduced to the dish, I have to admit, I did not quite see the appeal. I did not eat meat for number of years growing up. Those years which I was eating meat, I was more of a canned soup kinda kid. While they were a little abnormal to me, the homemade noodles were very tasty, but it took some time for me to warm up to the thought of homemade chicken broth. As I ate chicken noodle soup at her home over the years though, it became more and more apparent that while the soup was good, it was the love she served with it that made everyone love it so much.

Nowadays, I am a homemade chicken broth maker on a regular basis and think back with a smile to my former trepidation on the subject. I serve a gluten free version of her soup in my home now, with a few tweaks to make it my own. Just like she did, I make a big batch so there is plenty for everyone.

I am going to split the instructions into two parts. Today I will focus on making the chicken broth, and Part Two can be found here and be involve making the noodles and finishing the soup.

The chicken I use is the rotisserie chicken from Costco. It is something of a go-to meal for us when we have a lot going on. We eat the meat from them on one evening, along with whatever vegetables I can throw together, and the next morning the leftover carcasses get made into broth.

Broth Ingredients:
Two cooked carcasses
Half an onion
Four garlic cloves
Salt and pepper to taste
1 to 1 1/2 gallons of water


Place all  of the above ingredients into a large stock pan, using enough water to cover the chickens. Place a lid on the pot and bring to a low boil. Once boiling, reduce the heat to low and simmer for three hours, periodically checking on the progress. The broth will be a lovely golden yellow color when it is finished.


Once your broth is finished, turn the heat off and allow it to sit for a while and cool off. It doesn't need to cool off a lot, but enough that it will not burn you if it splashes. I use a large colander like a scoop and get as much of the chicken out as I can. The chicken will be falling apart at this point.


Place all the chicken pieces into a 8 by 13 inch pan to cool off further.

The chicken broth can be used just as it is at this point. I like to clarify mine a little bit. I pour the broth through the same colander I used to get the chicken out, and into a large pitcher. Then I let it sit on the counter for a little while, and then place it in the fridge so that the fat separates and hardens on the top. I do leave some fat in the broth, but I also do not want a super oily soup. Use your judgement, and scoop however much of the fat you want off of the top of the broth.

As it cools, the broth will solidify a little. It will have a consistency a bit softer than Jell-O. This is thanks to the gelatin that you get when you boil the carcasses. It does look strange if you have never seen it before, but don't be alarmed. The broth will turn right back into liquid once heated, and the gelatin is wonderful for your fingernails and hair!

Once the chicken is cooled enough to handle, pick off pieces of meat from the bones. Even though we use most of the meat when I carve the chickens on the first night, there is a surprising amount left.

I love the thought that I am not letting it go to waste! Place all the chicken meat in a container and save until it is time to prepare the soup.

When you are ready to make your soup, just pour the desired amount of broth into a pot and heat it up.

Monday, December 2, 2013

Gluten Free, Dairy Free Green Bean Casserole

Thanksgiving has now passed us by, and the world around me has changed quickly over into Christmas mode. I want to linger back a little and share this recipe for gluten and dairy free green bean casserole for you that my family enjoys. Although it is a typical Thanksgiving dish, it could be good for Christmas too, if you want to serve it then as well.


Ingredients:
2 lbs. fresh green beans
2 cups chopped mushrooms
1/4 cup earth balance vegan butter or similar alternative
1/4 cup cornstarch, plus another 1/4 cup cornstarch, separated
2 cans coconut milk
1 onion, cut into half-rings
1/2 lb. bacon (optional)
Salt and pepper to taste

Instructions:
Snap and prepare green beans (a great kid job). Start bringing a large pot of water to a boil. Once it is boiling, carefully drop in green beans and boil until fully cooked, but not overdone. Strain and allow to cool slightly.

At the same time, saute the mushrooms and set aside. Cook the bacon in the same pan, then set it aside as well. While the bacon is cooking, seperate the half-rings of onion and toss with cornstarch. Shake off the excess, and place the onion rings, a few at a time, into the bacon grease left after you took the bacon from the pan. Cook until browned and place aside.

In a large saucepan, melt the butter alternative over medium heat, and then stir in the remaining 1/4 cup of cornstarch. Stir  the butter and cornstarch mixture for a minute, and then pour in the coconut milk. Simmer the sauce mix, stirring frequently with a whisk and seasoning to taste with salt and pepper.

When the sauce has thickened, pour it over the green beans in a large bowl. Add the mushrooms and combine. Pour into a 9x13 inch pan and top with the onions and bacon.

Cook at 400 degrees for 15 minutes to heat thoroughly before serving.

Enjoy!


Thursday, November 10, 2011

Gluten and Dairy Free Pumpkin Muffins


With the weather getting colder, I have been craving pumpkin muffins. I was procrastinating on baking any since all of my previous gluten free muffin attempts have been....not so good. I did not want to spoil my fantasy of a perfect pumpkin baked good by turning out a funny looking and oddly tasting muffin. However, Gizmo started asking me about making them after seeing cans of pumpkin at the store so I decided to give it a go and create my own perfect GFCF pumpkin recipe. It took about six tries for me to get it right, but my family cheerfully ate up every attempt. I am my own harshest critic when it comes to my baking, but I think the recipe is just how it should be now.

Since I have long since discovered that the path to my husband's heart is paved with streusal, I made a streusal topping for the muffins. I included the ingredients and directions to making the topping, but it is optional, and we have enjoyed them just fine without it.


Ingredients:
2/3 cup brown sugar
2 Tbsp. maple syrup
1 cup pumpkin
3 eggs
1 tsp. vanilla
1/4 cup olive oil
1 cup almond flour (I use the leftover pulp from making homemade almond milk)
1 cup rice flour
1/3 cup corn starch
1 1/2 tsp. cinnamon
1/2 tsp. nutmeg
1/4 tsp. ginger
1 tsp. baking soda
1/2 tsp. salt
1/2 tsp. xanthum gum
3/4 cup almond milk

Streusal Ingredients:
1/4 cup almond flour
1/4 cup brown sugar
2 Tbsp. coconut oil
1 tsp. cinnamon

Preheat oven to 400 degrees and prepare a muffin pan by using muffin papers or spraying with nonstick spray.

In a large bowl, mix together the brown sugar, maple syrup, pumpkin, eggs, vanilla, and olive oil for about 2 minutes, or until well combined.

In a medium bowl, blend together the almond flour, rice flour, corn starch, cinnamon, nutmeg, ginger, baking soda, salt, and xanthum gum. Pour dry ingredients into wet ingredients and mix well.

Pour in the almond milk and mix until combined.

Spoon the batter into the muffin pan, filling each cup approximately 2/3 of the way full, and bake for 23-25 minutes.

On a few mornings when I have felt particularly lazy, I have prepared a 9 x 13 inch pan instead and just poured the batter into it. This does require a few extra minutes of baking time.

Makes 16 muffins.

Tuesday, November 8, 2011

Gluten and Dairy Free Zuppa Toscana


This recipe was one of my first triumphs against food intolerance. I am pretty sure that everyone who has been told that they should stay away from a particular food starts making a mental list of all the things that they can not have. Even though I was not all that upset when I found out that I would need to avoid casein in addition to the gluten which I had already stopped eating, I did start that list. Lasagna was the first item on the list, closely followed by cheese enchiladas. Surprisingly, I was okay with that. Then, however, I thought about zuppa toscana. My heart dropped a little. Zuppa toscana is a household favorite. Everyone enjoys it, and it is simple to prepare, not an easy thing to accomplish.

Over the next few weeks as I wrote up menus and did the grocery shopping, I found myself pondering what substitutions I could make to the original recipe to replace the heavy cream. Soy creamer was a possibility, as well as making extra-thick almond milk. I ended up using canned coconut milk, and I think I actually prefer my casein-free version more than the original.

Ingredients:
  • 2 lb. bulk Italian sausage (check the label to make sure it is gluten-free)
  • 2 large potatoes (I use really large ones from Costco, so if you have smaller ones, just chop up how much you want)
  • 2 Tbsp. Better than Bouillon Chicken Base (or equivalent bouillon cubes)
  • 8-9 cups of water
  • 1 bunch kale (about 9 cups chopped)
  • 1 can coconut milk
  • 1/4 cup sweet rice flour (not absolutely necessary if you don't have it, but does thicken up the broth nicely)
In a large pot, brown the sausage and drain the excess fat. Remove the pot from the heat while you skin the potatoes and thinly slice them. If the potatoes have a large diameter, you may want to cut the potato in half lengthwise before making the thin slices....trying to eat an enormous piece of potato is not an attractive look for anyone. :) Add the potatoes to the pot and cover with water. In a small bowl, whisk together the sweet rice flour with a small amount of water, then add to the pot. Add in the chicken flavoring, and bring to a boil. Turn down heat and simmer for approximately 20 minutes.

While waiting for the potatoes to cook through, wash and coarsely tear the kale. Ripping up the kale is a great job for little helpers, just make sure that the coarse stem doesn't accidentally make its way into the soup pot. Princess really likes helping with the kale.

Drop the kale into the pot and stir it around a bit. Pour in the entire can of coconut milk and stir until it is fully blended. Simmer for about 5 more minutes and serve.

Saturday, October 15, 2011

Millet for Breakfast

When the fall weather hits, I am a sucker for a nice warm bowl of oatmeal for breakfast. Unfortunately, oats are now one of those items on the "Do Not Eat" list for me, along with casein, gluten, and *gasp* chocolate. We have tried a few different items to fill the void that is left in our breakfast menus. Cream of Rice was one of our favorites, but I was not really happy about adding even more rice to our diet since that is now the grain we eat most frequently. What can I say....I am always just on the lookout for something new.

A few weeks ago I was hanging out at the library while the big kids were in their chess club. I was talking to one of the moms that I know from homeschooling activities in the area, and she mentioned that her daughter had made millet for breakfast. We have had millet flour mixed into baked goods, but I had never thought to eat it as a whole grain. I was pretty interested at that point. Millet went on my shopping list.

Cooking millet is pretty simple. I picked up a little instruction card when I bought the millet that said to simmer 2 cups water and 1/2 cup millet for about 25 to 30 minutes, or until the water is absorbed. I am still wondering if I could make it in my rice cooker....I bet I could.

I did find that the required 2 cups of water was not enough in my opinion. The millet still had a rather dry texture to it, so I added an additional cup of water and let it simmer a bit longer. When dished up, we added almond milk, brown sugar, and cinnamon to the millet. It was more filling than I had expected, so no one except for Squirt actually finished theirs, but they all assured me it was good.

Saturday, May 21, 2011

Caramel Popcorn


Note: While this recipe is gluten free, it is from the days before our family went dairy free.Things have been a little rough this week. Squirt has caught a stomach virus, and while I will not go into details, the result of his being sick is a massive yuck. He has also had a bit of a runny nose and fever due to the fact that he is teething. I took him in to the pediatrician and the only things we can do are to keep him hydrated, give him probiotics, and wait it out. Luckily for us, he is still a cute and pretty happy little guy.
Gizmo also had a camp out with her fellow girl scouts last night. I know that she needs some time to be on her own, and I am not about to stop her, but it is really hard. It is cliche, but they grow up so fast. I never thought I would think the house seemed empty because there was only three kids there, and yet, it really does.

To do something special for Spike and Princess yesterday, since they were not getting to go on a camp out, I told them I would make popcorn in the evening. After some soul searching, I decided that I really wanted caramel popcorn. And since caramel popcorn is so gosh darn good, I decided to share the recipe on here. This is the same way my mom and dad would make it when I was a kid. Mmmm...nostalgia.

First, pop yourself up some popcorn. We use an air popper. Microwave popcorn is a little funky to me, and my kids eat a helluva lot of popcorn, so it just makes more sense. I pop three batches worth for this recipe. If microwave popcorn is all your have, I am guessing it would probably be four to five bags.
I pop the corn in one container, give it a couple of good shakes, and then carefully transfer it to a larger container. Hopefully, all of the un-popped kernels will be on the bottom. Nothing ruins a sugar rush like a cracked tooth.

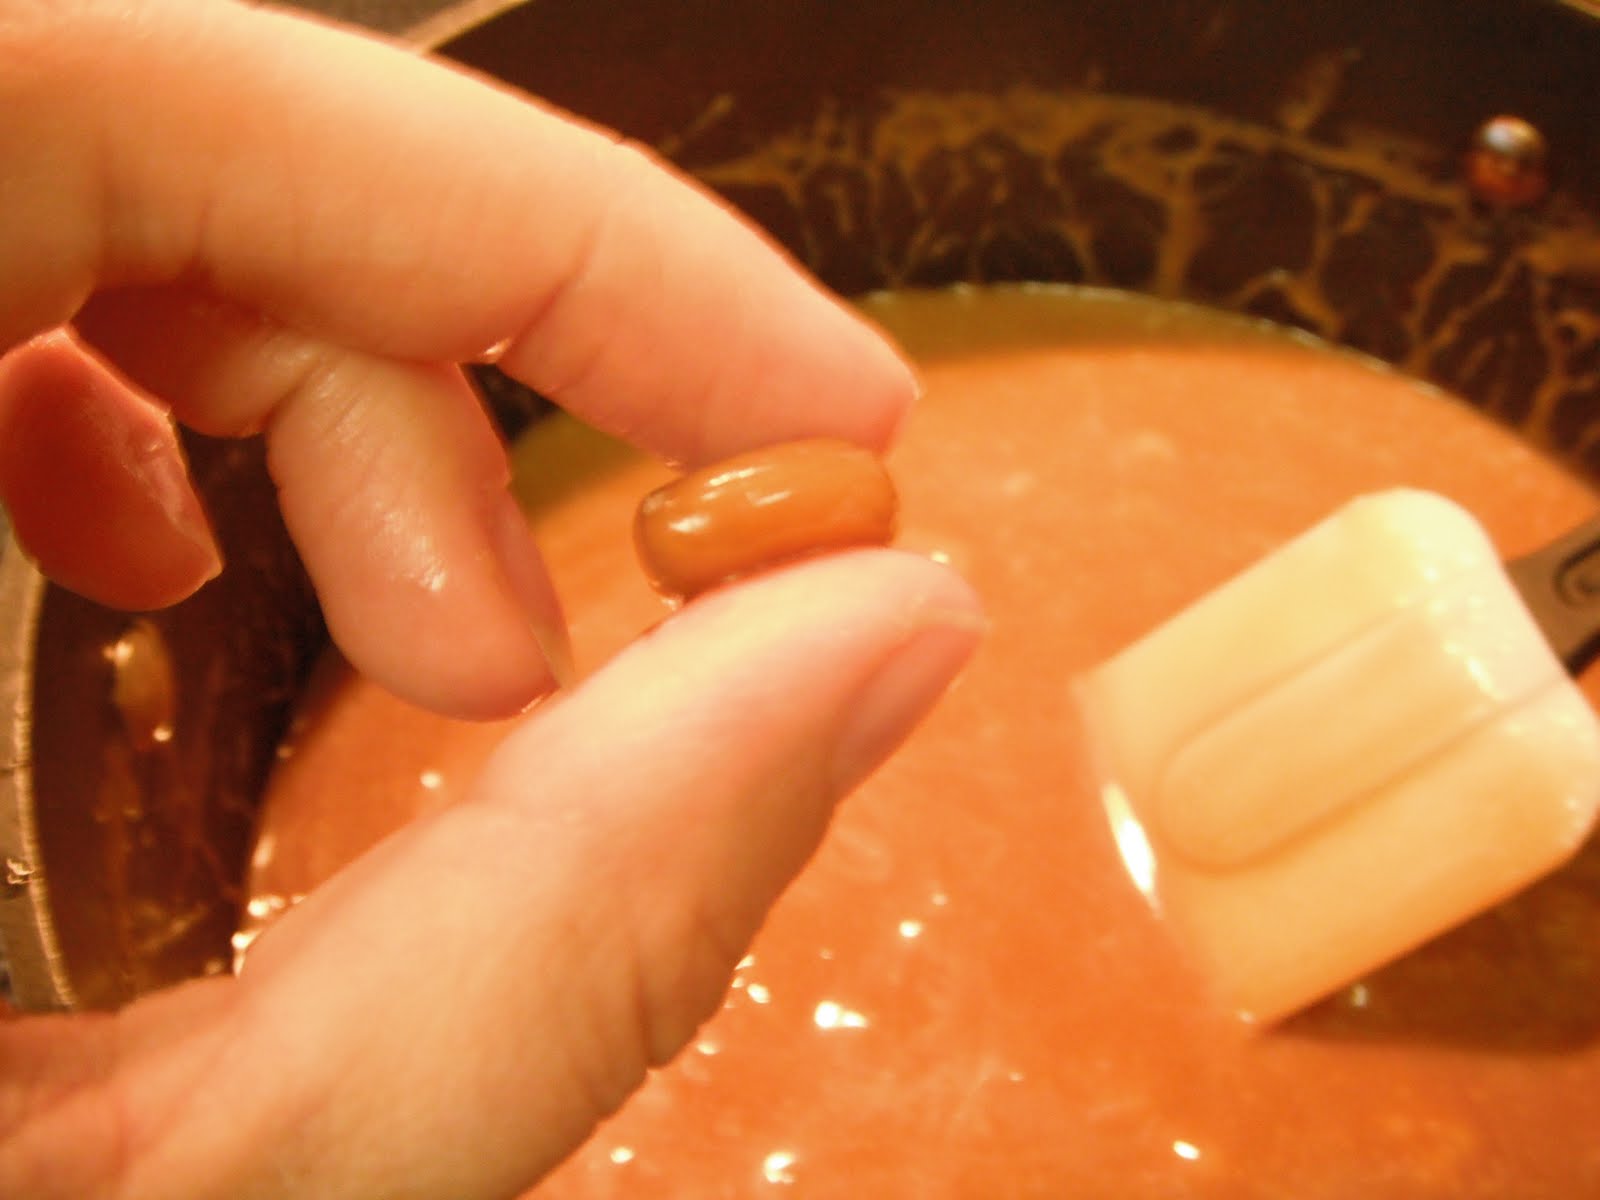
Next, in a large pot on medium-low heat, melt a stick of butter. When that is melted, add 4 cups of brown sugar and 1 cup of corn syrup. Stir it while the sugar dissolves. You should make sure that you can not see any sugar crystals, and then add 1 can of sweetened condensed milk. Keep frequently stirring until the caramel reaches the soft ball stage. If you have a candy thermometer, the temperature will be 235 to 245 degrees Fahrenheit. If you do not have a candy thermometer, get a cup with a few inches of cold water. Drizzle a little bit of the caramel into it, and then reach in and try to form it into a ball, like I did for the picture. If it just dissolves, you need more time. It should take about 10 to 15 minutes to reach the softball stage.

Now you are ready to pour the caramel over the popcorn. You need as big of a container as you can find for this and a stirring utensil that is non-flexible and long. I use a large pot that is roughly the size of a five-gallon bucket, and a large serving spoon. Pour the caramel across the top of the popcorn, and get stirring. The main trick to this is to try and not let the caramel touch your hands. Make sure you get down to the bottom of your container, because the caramel will all pool down there if you don't.

After getting the popcorn as well coated as you possibly can, you can choose how you want to form it. I spray a 9 x 13 inch pan with nonstick spray and flatten some in there, and make popcorn balls with the rest. Of course, my family generally eats some while it is still warm and sticky.

Ingredient List:
Popcorn, around 30 cups popped, more or less depending on taste
1 stick of butter
4 cups of brown sugar
1 cup of light corn syrup
1 can of sweetened condensed milk

Friday, April 15, 2011

Gluten Free Fry Bread

Navajo tacos are one of my family's favorite dinners. One of those rare meal ideas that all five of us who can eat regular food enjoy. I don't doubt that Squirt will like it as well when he gets a bit bigger. It was all great until me and my husband decided that for my health, and the future health of our kids, that we should go on a gluten free diet. Last week I had Navajo tacos on the menu, thinking I would figure something out when the time came. I did some internet searching, but I did not find any really good recipes for gluten free fry bread. I took some regular recipes and a few recipes using commercial gluten free flour mixes, made notes, and came up with my own to try. It was pretty good, but I figured I could do a little better. So here you are, my newly thought up and tried recipe for gluten free fry bread. Today I made it into a beignet style doughnut for the kids. They were very pleased with my efforts.

1 1/2 cups rice flour
2/3 cups cornstarch
1/3 cups tapioca flour
3 Tbsp. sugar
1 tsp. xanthum gum
2 tsp. yeast
2 tsp. dry milk (you could probably skip this and use milk instead of water if you don't have any)
2 cups very warm water (approximately 115 degrees, but does not need to be exact)
Hot oil for frying

Mix together the rice flour, cornstarch, tapioca flour, sugar, xanthum gum, and yeast in a large bowl. Add in water and mix well. The dough will be fairly batter-like. Let it sit for about an hour. It should look something like this.
I won't lie...it does not look all that appetizing at this point. It will be a white and slightly gelatinous mass. Just stick with me, it gets better.

This next step can be a little fiddly, so don't get discouraged if your first couple tries are not perfect. First, start getting the oil ready for frying. Get your hands wet and just shake them off so they are not too dripping wet. Then, reach into the dough and scoop out some batter. It should not be about a half of a handful, but you can mess around with it and figure out the size that works for you. With your other hand (making sure it is wet), gently pat the dough to flatten it out a bit. Try to be gentle enough to not complete deflate all the air out of it. After that, slide the dough off your hand into the awaiting hot oil. These will take longer to cook than normal fry bread does, so just be patient. Mine took approximately 10 minutes per batch to cook through. You will need to rinse and re-wet your hands frequently, otherwise the dough will just stick to you and make a mess.When they are finished, get them out, drain them, and them top them with whatever suits your fancy. Today we topped them with powdered sugar. The texture is even better if you let them cool a bit, so try and resist the urge to stick them right in your mouth. Enjoy!