Tuesday, February 18, 2014

The Birds and The Bees

Don't worry....this is not going to be an awkward blog post in which I sit you down and explain the facts of life.

The weather has been wonderful lately, and our backyard pets have been loving it. The bees are beginning to leave their hive and explore during the warmest parts of the day, eagerly awaiting blossoms. The chickens have been given the entire yard to wander. They spend their days looking for bugs and enjoying the sunshine. They do tend to make a mess of our mulch, but they are just happy I suppose it is alright.

Such a lovely day just called for introducing you to some of our pets.
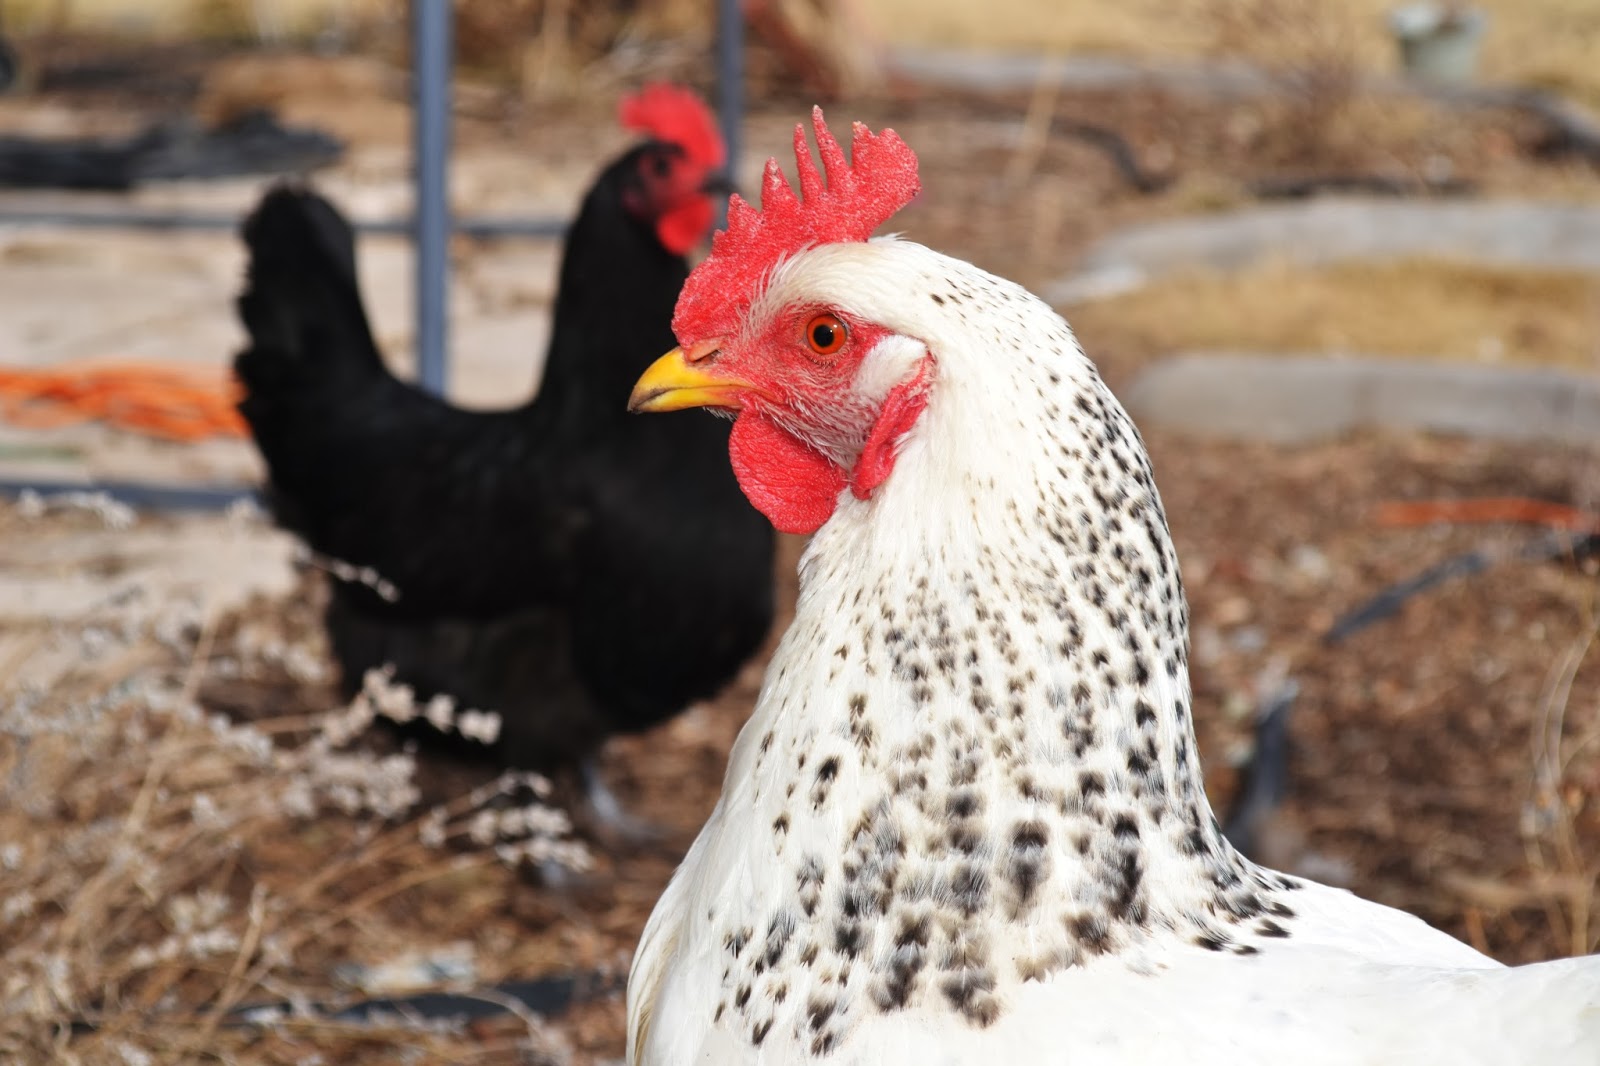
This is Spirit, a Delaware hen. Gizmo named her because she definitely had spunk, even as a little chick. She was three days old when we got her, and was kept in a playpen along with a few fellow chicks in the master bathroom until it was warm enough to go outside. She was known for escaping, and even now she sometimes tries to come into the house.

The pretty black hen in the front is Starlight. She is the only hen we have that has been hatched by a momma chicken. We don't have roosters, so I suppose you could say she was adopted. She is incredibly soft, but extremely hard to catch. In the background is Nickel, one of our Americanas. She lays gorgeous green eggs!

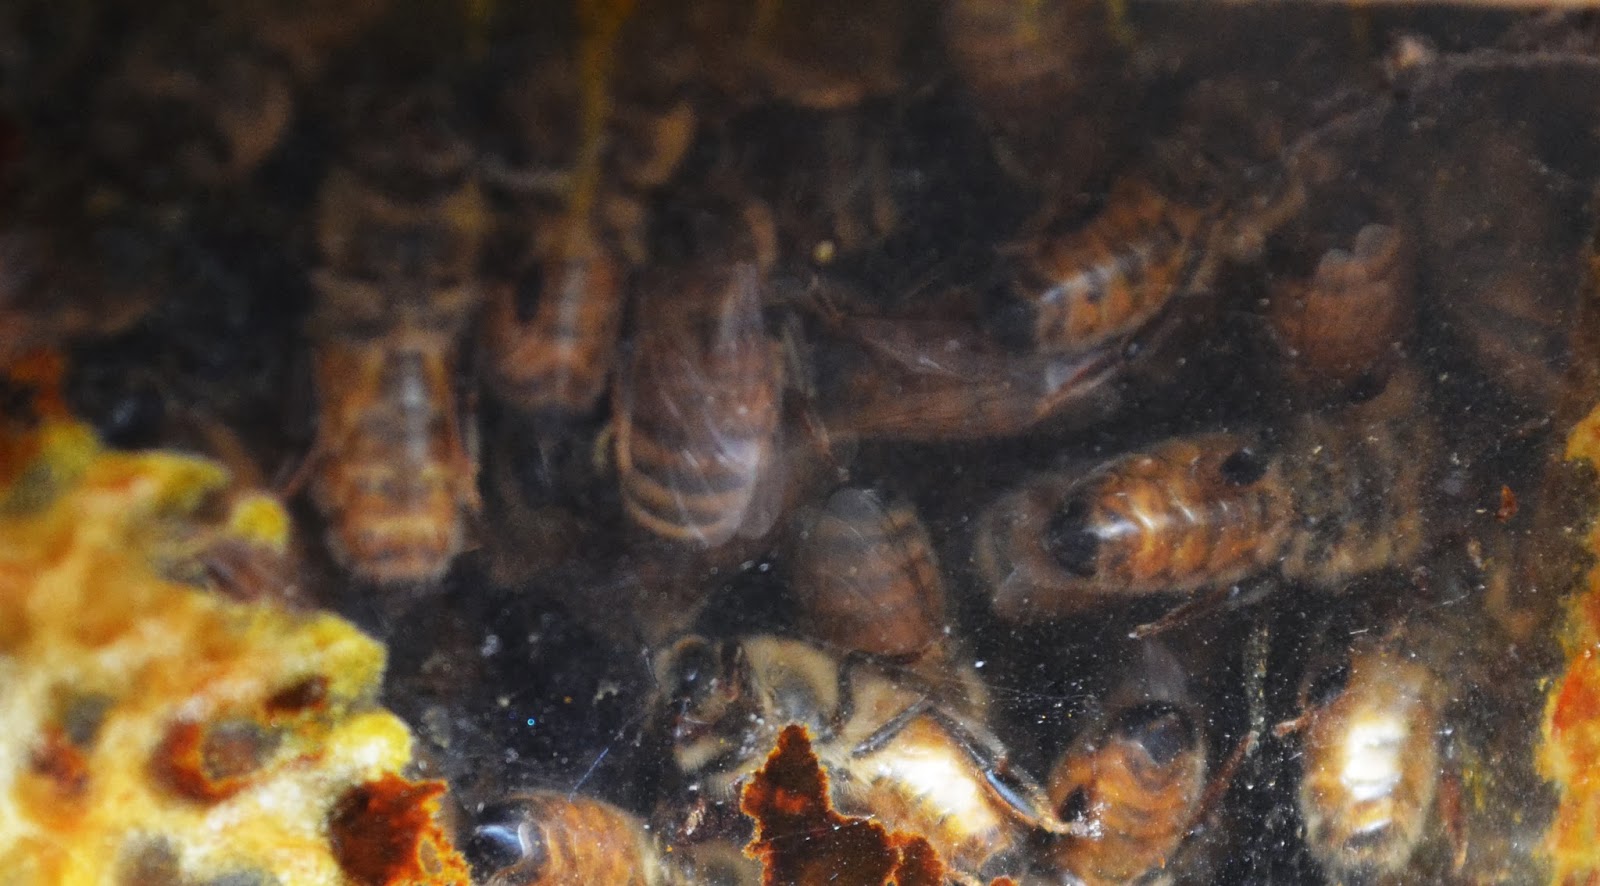
Since the bees are not fully active at this point, I was only able to take a few pictures through the hive window. All winter I have been peeking in their and seeing very little signs of life. With the worry of hive collapse, it is always a relief to see all bees doing so well.

This is an area of the comb that is attached to the window. You can see a bit of their honey stores, and if you look closely, you can see the bee hanging out between the two combs.


Tuesday, February 11, 2014

The First Hint of Spring


Winter often brings with it some terrible air conditions here. We have weather inversions that occur during those cold months, which basically means a whole lot of pollution gets trapped here. If a storm doesn't occur for a week or two, the air quality is visibly worsened.

Wonderfully, this past weekend the clouds sent down lots of rainy goodness that cleaned the air up beautifully. It is so amazing to be outside and realize how clear and wonderful it is after a good storm. I sometimes go for a jog while Spike is at his Boy Scout meetings, but I wanted to celebrate the clean air with something more than that. Princess and Squirt have been itching to ride their bikes, so they were thrilled as I loaded their bikes in the back of my car with the promise that I had a great place in mind to ride all they wanted.


I had a wonderful stroll, and both the kiddos had a great bike ride. Princess was very proud that she was able to pedal while standing up to make it up some of the hills. Squirt made it up the hills himself, with some power boost help from me. We saw a fancy bird house, horses, birds, and lots of very interesting sticks and rocks (a few which made their way home). I know it is not spring yet, but on days like these I can feel it coming. The air is still quite chilly, but it is clean, and I am happy with that.

Friday, February 7, 2014

Recent Spinning

I have not been doing very much spinning lately. Not because I do not enjoy it, but simply because I am trying to finish up a few crochet things I have been working on that I will share when they are finished.

My poor spinning wheel, which I have named Eve, has been sitting next to the television in our family room looking ever so lonely, while my stash of angora fiber from our bunnies, Molly and Beatrix, has been adding up.

The first yarn I spun was some undyed roving I had purchased for the purpose of learning how to use the spinning wheel. It still remains on the bobbin. I do have more of the roving left, so I will probably finish it up and ply it in the future, although I have no plans for it at this time.


So what am I currently working on? I am actually finishing up on some wool roving that I purchased before I received my spinning wheel for Christmas. I dyed the roving with Kool-Aid (grape and mountain berry flavors if you are wondering) and happily spun much of it on my drop spindle.  I had two balls of approximately the same size when I got the wheel, and decided to use it ply them together.

This is the result:
 I am now finishing spinning up all the purple and blue fiber into singles, and will afterwards ply it. The plan for this wool has always been to make a shawl. It is mostly fingering weight, although I will admit I do now spin as evenly as I aspire to. I do really enjoy the process though, so I am not really upset about the rustic-ness of the finished yarn. In this above skein, I have approximately 280 yards. I am anticipating another 350 or so when I am finally done. I am really excited to make something with this!


Tuesday, February 4, 2014

Cake for My Litttle Sister

 This past weekend, we happily celebrated my little sister's 21st birthday. She is on a gluten free diet, and her fiance was having a rough time finding a bakery that could make her a gluten free cake. We have a variety of places that make some great gluten free cupcakes, but sometimes a big cake just is better.

I did my best with trying to step up and make her a fun cake for her birthday. The bottom of the cake is an 8" cake with two layers, making it 4 inches tall. The middle, green part is a single 6 inch cake. The top was made by baking two cakes in thoroughly cleaned out tuna fish cans. I have used the tuna fish cans to make my kids little cakes that they could decorate and have all to themselves. They only require a small amount of baking time; I baked them for 15 minutes at 350 degrees. Of course, having such a small top layer gives the recipient their own personal cake, which is kind of fun.

I added a few personal touches, so it wasn't just a generic cake. The book is because my sister loves to read, the rock in the middle is a hearthstone from the game World of Warcraft that she plays, and the syringe on the bottom is because she does all sorts of labwork with blood at school. I realize a syringe is not used to draw blood....but it was the closest I could make and still have a recognizable object.


I also used a new technique on this cake by slightly steaming it before piping the frosting and adding the final decorations. I usually have a problem with cornstarch showing on the fondant, especially with brighter colors, and the steam really helped clear it up. Since I do not have a professional steamer, I was able to use my iron on a steam setting, holding it a few inches from the cake.


Friday, January 31, 2014

Chicken Noodle Soup - Part Two

This is the second part of my posts on making gluten and dairy free chicken noodle soup. On this post, I will focus on making the noodles, and finishing the soup. Part one discusses making the broth and preparing the chicken, and that can be found here. All measurements used here are for making a very large pot of soup, but it will last in the fridge for a few days and is great to reheat for lunches.

First things first, I pull the chicken broth that I made the previous afternoon out of the fridge and gently pour it into a large pot; most likely the same pot I made the broth in. As mentioned in the previous post, I have really close to a gallon of broth. I often pour it through a strainer. Also, pouring slowly helps keep some of the fat that has solidified in the container, and not in the finished product. I don't mind some of it making it's way into the soup, as it does add to the flavor and how satisfying the soup is.

Next, add:
3 cups of chopped carrots
5 garlic cloves (minced)
Salt and pepper to taste

While the broth simmers away, move onto making the noodles.

Noodles:
2 cups white rice flour (brown rice flour is not a good substitute for this)
2 cups tapioca flour
2 1/2 tsp. xanthan gum
1 tsp. salt
2 tsp. herbes de provence
6 eggs
1/3 - 2/3 cup of water

Preparation:
Mix together all the dry ingredients. This can be done on a bowl, or just in a pile on your countertop. I use the counter, since that means one less bowl to wash, and gives my children the impression that I am awesome. They sometimes gather to watch....


Form a well in the middle of your dry ingredients that can can crack the eggs into, and then....you guessed it....crack the eggs into it. It will look something like this.


Use a fork to break up the eggs and start incorporating them into the flour mixture. After a minute, you will need to use your hands to knead and squish the mixture to get it as combined as you can. It will not be holding very well together at this point, but you should be able to see it start forming. A little at a time, add water and mix it in well. In our super dry climate, I need to add almost 2/3 cup, but you might need quite a bit less. It is best to stick to a tablespoon at a time, mixing and kneading, until you get a a dough that holds together well. Your hands will be covered in dough by this point, so chase a kid of hubby around for a minute.

Dust your surface with the rice flour and start rolling the dough. Thickness can be a matter of preference, but remember that the noodles will get a little thicker when they are dropped into the broth. Roughly 2/8 inch is a good thickness. Ours tend to be thick, where my husband's grandmother made hers amazingly thin. This may be because I lack patience.

I am not reached perfection at rolling, and neither is my 11-year-old who was helping me. We always end up with a weird shape and not a nice circle or rectangle. If that is what you end up with too, that is alright! We are going for a comfort food item that would more likely be served in a grandmother's kitchen that in a fancy restaurant.

Using a pizza cutter, cut long strips that are 1/2 inch thick, or at least close to it. As I am usually just trying to get dinner on the table, mine are all sorts of thicknesses. The kids and hubby don't seem to mind. Make cuts cross-wise so that the noodles are about 5 inches long.
Using a spatula, pick up the noodles, separating any that stick together as you place them on a plate. Carry them over to the broth with about a plateful at a time. Grab a small handful and drop them in almost like you are sprinkling them into the broth. If they go in too quickly together, they will stick together into a big noodle blob.

Chop up chicken that was prepared previously, if needed, and then drop into the soup.

Bring to a low boil and cook for another 15 minutes, stirring frequently, and checking the noodles to make sure they are done.

Serve yourself and your loved ones up a comforting bowl of soup and relax.


Tuesday, January 28, 2014

Gluten Free Chicken Noodle Soup - Part One

My husband's grandmother recently passed away, leaving a big hole in the hearts of everyone who knew her. One thing that she was particularly known for was her chicken noodle soup. When I was first introduced to the dish, I have to admit, I did not quite see the appeal. I did not eat meat for number of years growing up. Those years which I was eating meat, I was more of a canned soup kinda kid. While they were a little abnormal to me, the homemade noodles were very tasty, but it took some time for me to warm up to the thought of homemade chicken broth. As I ate chicken noodle soup at her home over the years though, it became more and more apparent that while the soup was good, it was the love she served with it that made everyone love it so much.

Nowadays, I am a homemade chicken broth maker on a regular basis and think back with a smile to my former trepidation on the subject. I serve a gluten free version of her soup in my home now, with a few tweaks to make it my own. Just like she did, I make a big batch so there is plenty for everyone.

I am going to split the instructions into two parts. Today I will focus on making the chicken broth, and Part Two can be found here and be involve making the noodles and finishing the soup.

The chicken I use is the rotisserie chicken from Costco. It is something of a go-to meal for us when we have a lot going on. We eat the meat from them on one evening, along with whatever vegetables I can throw together, and the next morning the leftover carcasses get made into broth.

Broth Ingredients:
Two cooked carcasses
Half an onion
Four garlic cloves
Salt and pepper to taste
1 to 1 1/2 gallons of water


Place all  of the above ingredients into a large stock pan, using enough water to cover the chickens. Place a lid on the pot and bring to a low boil. Once boiling, reduce the heat to low and simmer for three hours, periodically checking on the progress. The broth will be a lovely golden yellow color when it is finished.


Once your broth is finished, turn the heat off and allow it to sit for a while and cool off. It doesn't need to cool off a lot, but enough that it will not burn you if it splashes. I use a large colander like a scoop and get as much of the chicken out as I can. The chicken will be falling apart at this point.


Place all the chicken pieces into a 8 by 13 inch pan to cool off further.

The chicken broth can be used just as it is at this point. I like to clarify mine a little bit. I pour the broth through the same colander I used to get the chicken out, and into a large pitcher. Then I let it sit on the counter for a little while, and then place it in the fridge so that the fat separates and hardens on the top. I do leave some fat in the broth, but I also do not want a super oily soup. Use your judgement, and scoop however much of the fat you want off of the top of the broth.

As it cools, the broth will solidify a little. It will have a consistency a bit softer than Jell-O. This is thanks to the gelatin that you get when you boil the carcasses. It does look strange if you have never seen it before, but don't be alarmed. The broth will turn right back into liquid once heated, and the gelatin is wonderful for your fingernails and hair!

Once the chicken is cooled enough to handle, pick off pieces of meat from the bones. Even though we use most of the meat when I carve the chickens on the first night, there is a surprising amount left.

I love the thought that I am not letting it go to waste! Place all the chicken meat in a container and save until it is time to prepare the soup.

When you are ready to make your soup, just pour the desired amount of broth into a pot and heat it up.

Friday, January 24, 2014

Get Air Trampoline Park

Our school-age children attend a homeschooling type charter school, in which they attend either one or two days a week, and the rest they have school at home. It has provided a great way for them to still have the education we were seeking by homeschooling, but still participate in group activities (like choir or speech and debate). This week we had the opportunity to go on a field trip to a trampoline park with their school. There was quite a turnout, but not enough to make the park seem crowded.

We went to Get Air Sportsplex, which boasts that it is the largest trampoline park in Utah, and the kid's all had a blast. Admission is charged by the hour, and we chose to stay the full two hours that the school had reserved the park. I had lots of fun playing with the kids, and we all left a bit flushed and tired.

The big kids spent quite a bit of time doing large jumps and flips into the foam pits, Princess took small jumps, and Squirt just ran right in. It was extremely difficult to get out there, and Squirt especially enjoyed lounging out amidst the foam cubes.


To prove that I was no party pooper, and was jumping right along with the kids, Gizmo took pictures of me as proof.  Brady says I should have tried doing flips.....maybe next time.

There was also a large area to jump and run to your heart's content. Gizmo and Spike mastered jumping up onto the raised platforms and landing on their feet quite well. The trampoline ramps and slides were also a lot of fun.


 The trampoline park was a great way to blow of some of our spring fever, although I think I may have annoyed at least one of my children with all of my picture taking.