

Easter has came and went in a flurry of chocolate and jelly beans. Luckily, my kids also really love to eat hard boiled eggs so they got some healthy protein along with their mass consumption of sugar.
We dyed Easter eggs as we normally do this year, but instead of mixing and pouring the beautiful colors of leftover dye down the sink, I decided to try and dye some wool yarn with it.
I chose a skein of KnitPicks Stroll in white, since I really wanted the brightness of the colors to show up. This yarn was great to work with, and is still wonderfully soft after dying. KnitPicks does also carry a line of "Bare" yarns and fibers that are unbleached and a natural creamy color that would also work great. I am really thinking about ordering some of the Glimmer yarn that has a small amount of stellina for sparkle!
In order to take the dye, just remember that your yarn needs to be a protein fiber (animal fiber) and not cellulose fiber (plant fiber), or synthetic fiber. While having some cotton or acrylic in the yarn is okay, those will just not accept the color the same way, so try to stick with yarns that are mostly composed of animal fibers like wool, silk, or alpaca.
In order to take the dye, just remember that your yarn needs to be a protein fiber (animal fiber) and not cellulose fiber (plant fiber), or synthetic fiber. While having some cotton or acrylic in the yarn is okay, those will just not accept the color the same way, so try to stick with yarns that are mostly composed of animal fibers like wool, silk, or alpaca.
I started preparing to dye my yarn by winding it up on my niddy noddy. I did not measure and really just tried to get three hanks of different sizes. I got a little carried away, and my last hank was pretty small. This yarn is destined to be used on my sock yarn blanket, so having a very small skein is not a problem.
I tied each hank in four places to keep it from getting tangled. I use white acrylic yarn for tying since it is cheap and it easy to spot and clip when I want it off.

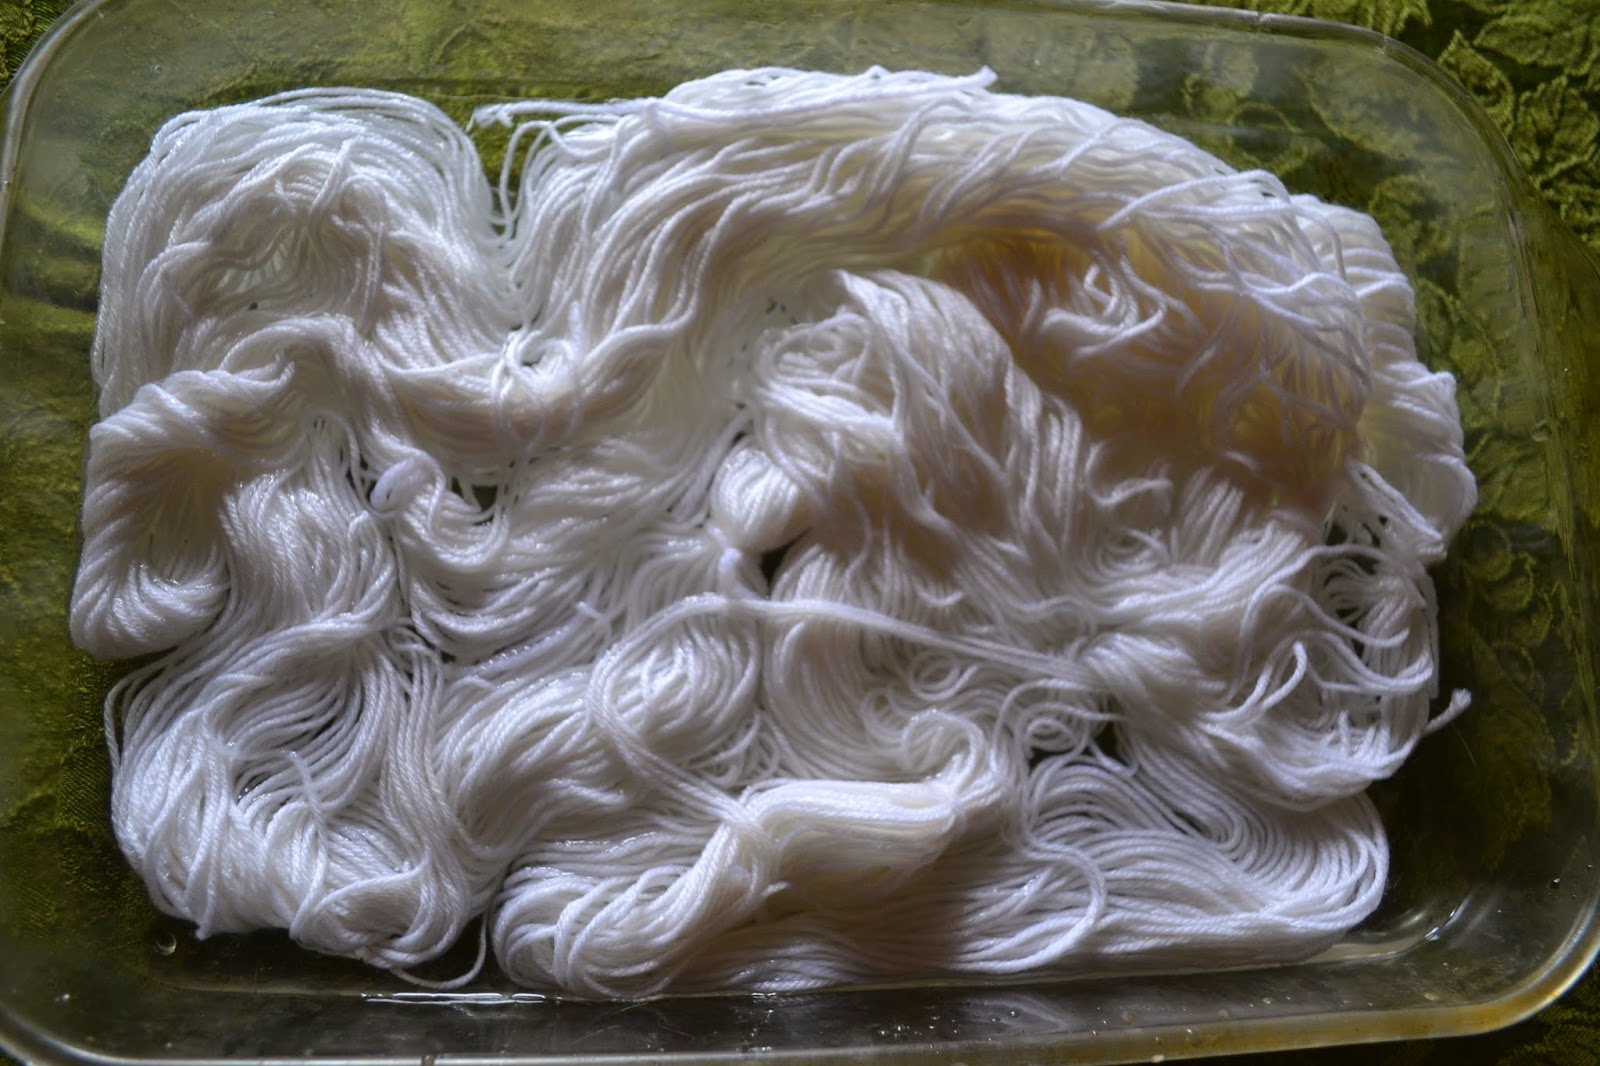
I then soaked the yarn in a 9 x 13 inch pan for about an hour, squishing it slightly every now and then to help it get thoroughly wet. It looks a lot like rice noodles and I have been craving pad Thai since.

The dye was left pretty much just how it was when we used it to dye our eggs, complete with vinegar. The only change I made was to add a bit of water to each cup to allow for more swishing around room.
With the largest skein, I held it in roughly thirds, and placed each third into a different cup of dye, using the pink, blue, and green. The medium skein was split between the yellow and light green, and the smallest skein was plopped into the red.
The dye bath will need to be heated up, and the microwave makes that really easy. I listed up each group of dye cups into the microwave one at a time and heated them up. You may need help holding all of the cups at once while placing them into the microwave. Each set had a different amount of time since I was working with a different amount of water, so you may need to experiment a little to get the water nice and hot like a steaming cup of tea.
Leave the cups and yarn in the microwave while it cools down completely, or at least enough to handle safely. I did move the areas that were white a little to once cup and then the other while the dye was cooling. Once the yarn has reached room temperature you can remove it from the dye baths and rinse it thoroughly.
After removing your yarn, you may reuse the dye bath if there is any dye left. I had Gizmo help me take a picture of my pink dye bath, which I completely exhausted. Dipping a white measuring cup or spoon into the dye will show you how much color you have left. In this case, the dye had been all soaked in and the liquid looked just like plain water.

Let you yarn hang and dry, then enjoy!

Another little tidbit of information I will pass on is to visit the clearance section of your stores after Easter. There are usually some Easter egg kits left over, and you can get them for a great price. I was super excited to snag quite a few this year for .37 each. Lots of fun dying experiments for me!

I tied each hank in four places to keep it from getting tangled. I use white acrylic yarn for tying since it is cheap and it easy to spot and clip when I want it off.
I then soaked the yarn in a 9 x 13 inch pan for about an hour, squishing it slightly every now and then to help it get thoroughly wet. It looks a lot like rice noodles and I have been craving pad Thai since.
The dye was left pretty much just how it was when we used it to dye our eggs, complete with vinegar. The only change I made was to add a bit of water to each cup to allow for more swishing around room.
With the largest skein, I held it in roughly thirds, and placed each third into a different cup of dye, using the pink, blue, and green. The medium skein was split between the yellow and light green, and the smallest skein was plopped into the red.
 |
| Three color dye bath with pink, green, and blue |
 |
| Two color dye bath with green and yellow. |
 |
| Single color dye bath with red. |
Leave the cups and yarn in the microwave while it cools down completely, or at least enough to handle safely. I did move the areas that were white a little to once cup and then the other while the dye was cooling. Once the yarn has reached room temperature you can remove it from the dye baths and rinse it thoroughly.
After removing your yarn, you may reuse the dye bath if there is any dye left. I had Gizmo help me take a picture of my pink dye bath, which I completely exhausted. Dipping a white measuring cup or spoon into the dye will show you how much color you have left. In this case, the dye had been all soaked in and the liquid looked just like plain water.
Let you yarn hang and dry, then enjoy!
Another little tidbit of information I will pass on is to visit the clearance section of your stores after Easter. There are usually some Easter egg kits left over, and you can get them for a great price. I was super excited to snag quite a few this year for .37 each. Lots of fun dying experiments for me!
No comments:
Post a Comment